1. Introduction
Use the Settings menu to manage users, license, and proxy settings.
2. General
The General settings let you configure data retention policies and perform software updates.
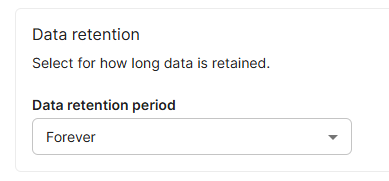
Data retention
Select for how long data is retained. The default retention period is forever.
Request content visibility
The Request Content Visibility setting controls which user roles can view the original content of AI requests captured by Verax Protect.
By default, only Super Admins can view request content. You can optionally grant access to:
Admins
Security Analysts
Users
When disabled, users can still view interaction metadata such as the user, tool, timestamp, action taken, and matched policy, but the original request content is hidden.
Restricting request content visibility helps minimize unnecessary exposure of sensitive information while allowing authorized personnel to investigate AI activity when needed.
Version
The version settings display the current version. If a new version is available, Verax will display it on this page. Click Download update to update to the newest version. 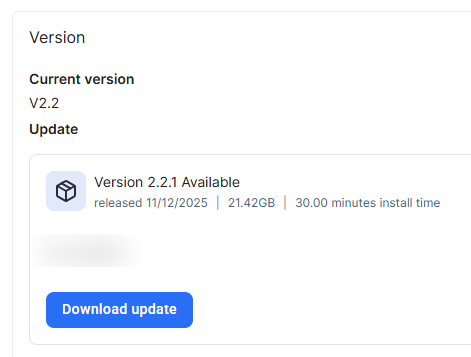
3. User Management
The User Management page lets you add, delete, and edit users.
Add a New User
Add a new user under Settings > User Management.
To add a new user, click Add user on the top right.
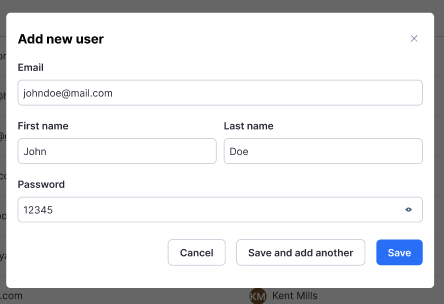
The Add New User dialog appears. Fill out the fields and then click Save. Click Save and add another to add multiple users. You can only add one user at a time.
Email
First Name
Last Name
Password
The password must abide by the following guidelines:
At least 8 characters
1 lower case character
1 upper case character
1 special character
1 number
Edit Existing Users
To edit an existing user, click the three dots to the right of the user.
Currently the only option available is Reset password but more options will be added in the future.
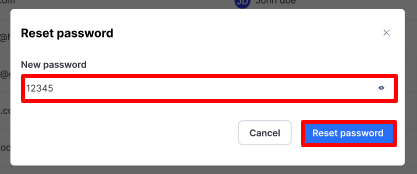
To reset a users’s password, click Reset password. Enter the New password and click Reset password.
Delete a User
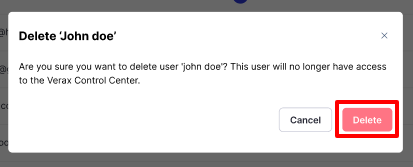
To delete an existing user, click the three dots to the right of the user and choose Delete.
The user will be removed from the system and will no longer have access to Verax Protect. Click Delete.
4.License
The License page shows your license details, including time remaining and the license expiration date. Learn more about License.
5. Traffic Redirect
The Traffic Redirect page allows you to configure how AI traffic is routed to Verax for inspection and enforcement. You can integrate with an existing secure web gateway using ICAP, or redirect traffic directly through the Verax Web Proxy using DNS, PAC files, host-based routing, or static NAT rules.
This page provides the required ICAP endpoints, proxy configuration details, and the list of AI tool domains that must be routed through Verax to ensure inspection.
For secure HTTPS inspection, you can either:
Download and install the Verax CA certificate and use it when routing traffic through the Verax HTTP proxy, or
Upload your own organizational certificate to override the default Verax-provided certificate.
Proper configuration ensures that AI interactions are inspected, monitored, and protected according to your organization’s policies.
6. Identity Provider
The Identity Provider tab lets you connect your organization's identity provider to enable user authentication and identity-aware AI policies in Verax.
Follow these steps to configure your organization’s identity provider for Verax:
Once connected, you can enable Identity enforcement under Protect > Global settings.
7. LLM Integration
LLM Integration in Verax
Verax allows you to connect your own large language model (LLM) to enable specific AI-assisted features within the platform. This integration is optional and fully controlled by your organization.
This article explains what the LLM integration is used for, how it works, and what data is and is not shared with the model.
What is the LLM Integration?
The LLM integration allows Verax to use your organization’s LLM provider to assist with selected configuration workflows.
Currently, the LLM is used to support policy and rule configuration, such as:
Extracting topics and entities for Topic Similarity conditions
Helping structure rule conditions based on administrator-provided input
The LLM is not used to process or analyze end-user AI interactions.
Bring You Own LLM
Verax follows a bring-your-own-LLM model.
This means:
You choose which LLM provider to connect
You provide and manage the API credentials
Verax does not use a shared or managed model on your behalf
All LLM interactions occur using your configured provider and credentials.
What Data is Sent to the LLM
Verax sends only configuration-related input to the LLM.
Specifically, this includes:
Text entered by administrators when defining rule conditions, such as topic descriptions
Metadata required to extract topics or entities from that text
This data is sent only when an administrator explicitly triggers an LLM-assisted action, such as generating topics and entities.
What Data is NOT Sent to the LLM
Verax does not send the following data to the LLM:
End-user prompts or responses
AI chat conversations
Customer or employee content
Sensitive or regulated data detected during enforcement
Logs, alerts, or traffic data
Any runtime AI interactions
The LLM is never used in the real-time enforcement path.
Enforcement Without an LLM
Connecting an LLM is not required to enforce rules in Verax.
If no LLM is connected:
Rules continue to be enforced normally
Topic similarity conditions can be configured manually
All other condition types remain fully functional
The LLM integration is designed to assist configuration, not to gate security enforcement.
Connecting an LLM
To connect an LLM:
Navigate to Settings → LLM Integration
Select your LLM provider
Provide the required API credentials
Save the configuration
Once connected, LLM-assisted features become available in supported configuration workflows.
Summary
The LLM integration in Verax is designed to provide optional, controlled assistance during policy configuration while maintaining strict data boundaries.
You control the LLM provider
Only configuration input is shared
No end-user or sensitive data is sent
Enforcement does not depend on the LLM
This approach allows organizations to benefit from AI-assisted configuration without compromising security or data governance.