1. Introduction
Set up your proxy settings to connect to Verax. Connect via a proxy to allow Verax to receive data from your chatbots in real-time to take full control of all of the Verax Connect features.
2. Set up a Proxy
To set up a proxy, do the following:
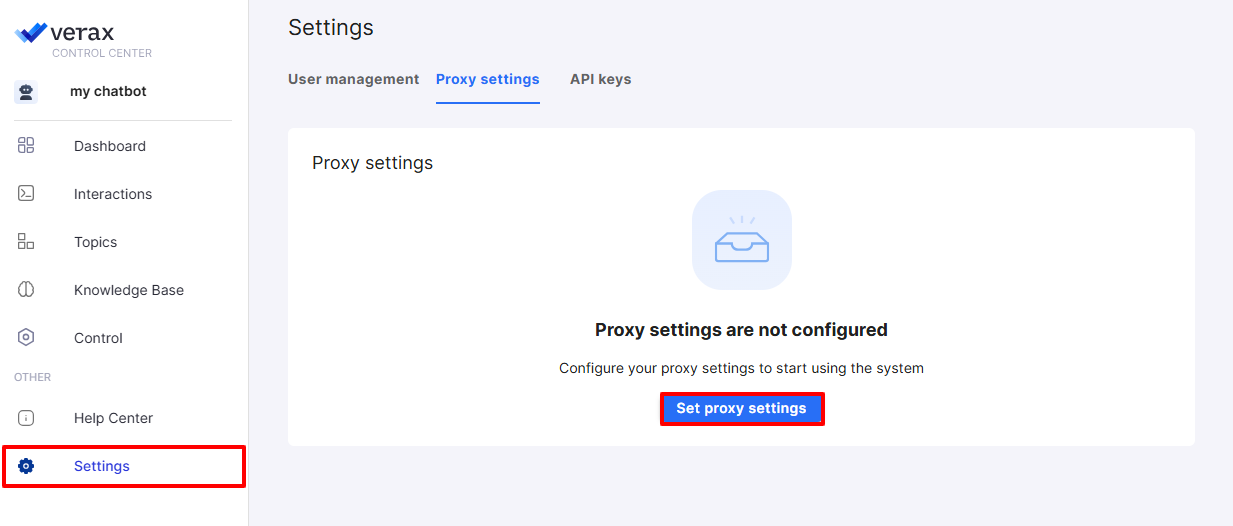
Click on Settings > Proxy settings.
Click Set proxy settings.
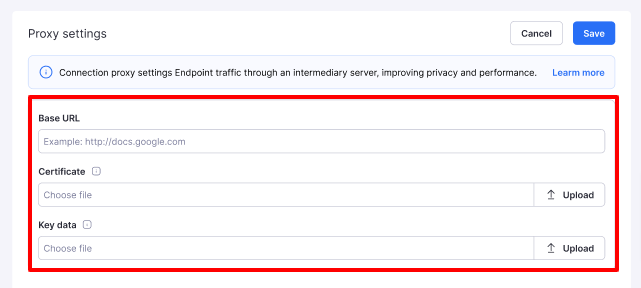
Under Proxy Settings, do the following:
Enter the Base URL of your chatbot's API. Each chatbot has its own unique URL and endpoints.
Generate and upload the Certificate and Key. The certificate allows the proxy to configure your API calls to go through the Verax Control Panel. Work with your Certificate Authority to generate a certificate or generate it locally with the proper trust settings.
Under Endpoints, do the following:
Add the API Endpoints for the Post path of your chatbot's API. Some chatbots have multiple endpoints.
Click Add Endpoint to add additional endpoints.
Click Remove Endpoint to remove an endpoint.
In order for your endpoints to appear on this screen, you must first configure your chatbot's DNS server to send requests to the Verax Public API which can be found in your registration.
Once configured, send a random DNS request for Verax to receive your endpoint information.
Note: For a POC setup, you can change the local host to redirect to the proxy to the Verax Control Center IP address, which should resolve immediately. For Production setups, you must perform the redirect through your DNS server, which may take more time.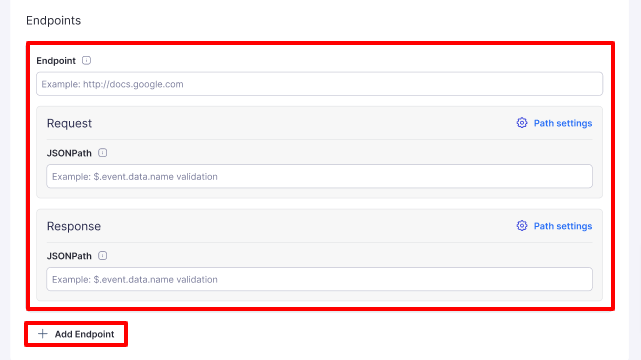
For each endpoint, review the request and response bodies and add the relevant JSONPaths.
Review the JSONPaths’ Value prior to proceeding.
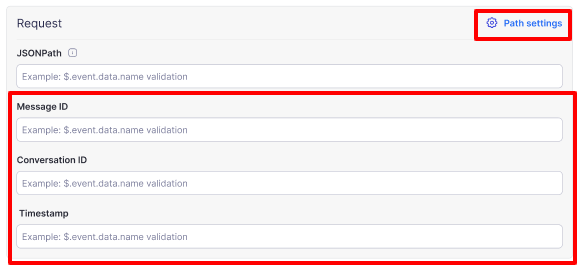
Click Path settings to add optional paths to improve analysis accuracy.
Add the Message ID path to make it easier for Verax to locate chatbot messages within the JSON and therefore improve analysis.. The Message ID usually appears as a key within the response body.
Add the Conversation ID path to make it easier for Verax to locate chatbot conversations within the JSON and therefore improve analysis. The Conversation ID usually appears as a key within the response body.
Add the Timestamp path to help you to improve timestep response accuracy in the Verax Control Center. The Timestamp usually appears as a key within the response body.
Click Save.